Tuesday, February 19, 2013

Bedlam in my Studio!

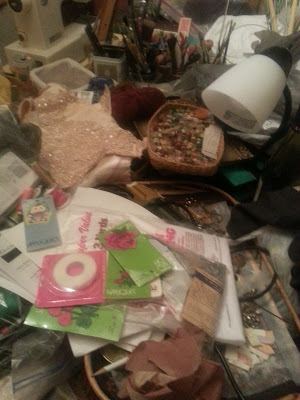
It's official - the mess in my studio has gotten totally out of control. It's time to put in some organizational effort. Believe it or not, there is a dining table under there. Yes I have taken over the entire dining room as my studio. (Or my lair as my son has dubbed it.) But when you live in a small house - under 2,000 sf - there aren't a lot of options.

the mess on the table in my studio

Usually there is some uncluttered surface on top of my printer's cabinets. My husband bought these cabinets for me, and I LOVE them. Before I had these, I couldn't get anything done because I could never find anything. I told my husband he was off the hook for gifts for the next five years. 

I keep an exercise ball in front of the cabinets. I can sit on it and go through all the drawers until I find what I need. 

my messy printer's cabinets

Time to get to work but I do love it when I'm organized!


My Latest Obsession - Scrabble Tiles

I've gotten a number of Scrabble tiles from garage sales. They've been lurking in my printer's cabinet drawers waiting for inspiration. A few days ago, an idea struck me.  Last summer, I went on a paper marbling binge. I can only marble part of the year because I have to do it outside and the temps need to be between 70 degrees and 90 degrees for greatest success. Around here that's fairly limiting - at least during daylight. So when I had some nice weather I went mad marbling everything. First I did plain paper, then I started marbling pages from books I had collected.

So it occurred to me that these pages might look great on Scrabble tiles. Here's what I ended up with after working obsessively for days.

Scrabble tiles with marbled paper

Here's a closer look at the whole lot. I really love old typography.You can see that I used a number of different materials for my marbling.

close-up of Scrabble tiles with marbled paper

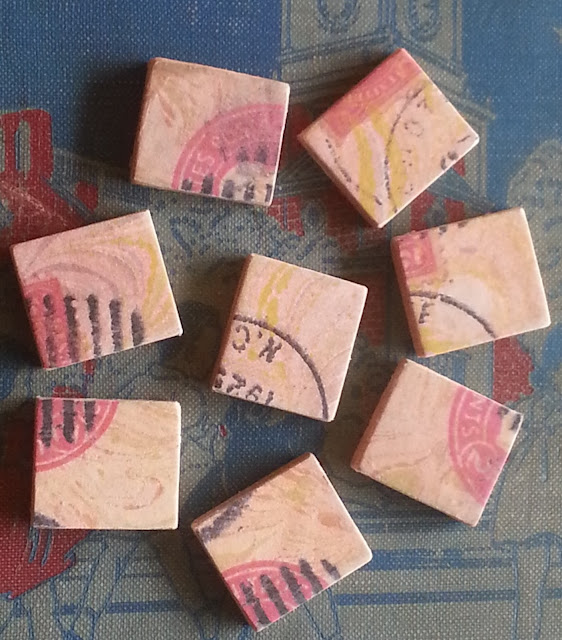
Here is an example of an old envelope from the 1920's. Postage was only two cents! I marbled the envelope and here it is in little sections. I love the look.

Scrabble tiles with marbled antique envelope

These were made from the letters that came with the envelopes. Don't you love that people used to write letters? What a lost art. 

For some reason, these were very difficult to photograph. The camera seemed insist on focusing on the book cover instead of the tiles even though I told it to focus on the tile.

Scrabble tiles with marbled vintage love letter

These were made from the pages of a book on mechanics from the 1800's. I love the graphic look of the illustrations.

Scrabble tiles decorated with marbled vintage book page

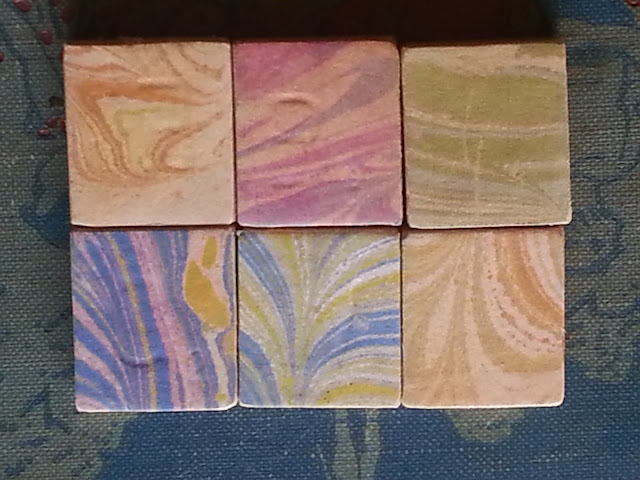
Here are some examples of the backs of the tiles. I used the plain paper from the edges of the book pages on the backs. You can see some of the Scrabble letters. After a while, I learned to not press down the paper on the center of the tile.

Scrabble tiles decorated with marbled paper

Next I want to spray them with artist's varnish to protect them, but I need warmer weather for that. I am also trying to decide whether to solder around the edges. Then I get to make jewelry - what fun! My head is spinning with ideas. 


Monday, February 11, 2013

From Amulet to Necklace

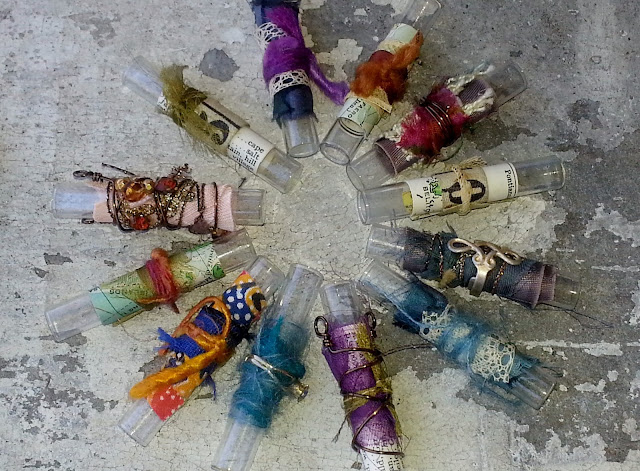
I love the colors on these little vials. I thought they'd be great for carrying a personal message, therefore I'm calling them amulets.

fiber arts decorated glass vials


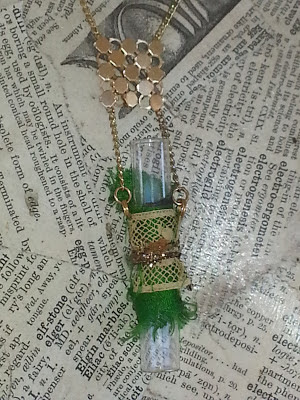
So I picked a bright green sari silk and lace vial. It also has some yarn wrapped around it that has a hint of gold. So I decided to bring out the gold tone. I had a vintage gold mesh purse that had seen better days. I used a piece of the gold mesh and suspended the vial under it. I like how it turned out!

decorated recycled glass vial necklace with green sari silk

recycled fiber arts decorated glass vial

Next I picked a blue silk and vintage lace amulet. I happened to have (after years of collecting) several vintage light bulb covers. In the early 1900's electricity was still fairly new, and the ceiling light was often a bare bulb. Of course it was glaring. So people hung beaded covers over the bulb. I imagine it would have been quite pretty with the light shining through the glass beads.

I've also seen a few new beaded light covers in stores recently. I know Ornamentea here in Raleigh has some. By the way, Ornamentea is a great store for jewelry makers; their store displays are unique and gorgeous.

One of my beaded bulb covers has brightly colored beads in several colors. I'm not sure how old this one is but the metal definitely has some patina. I used some of the bulb cover to make part of the necklace for this amulet. I especially like the variation in the shades of yellow.

upcycled glass vial necklace with recycled fibers and beads


And I like how the blues and yellows play well together. Wouldn't this look great with a T-shirt in the summer?

recycled glass vial, fibers, and beads make a great necklace


Personal Amulets - Fiber Collage?

I'm not sure what to call these. I like to think of them as personal amulets - that the wearer could carry a personal message of some kind in each vial. Maybe just a single word or a snippet of a love letter or photo.

fiber arts collage on recycled glass vials

I bought these tiny glass vials at an estate sale and had no idea what to do with them. Until I made the first amulet. Then I had so much fun making them that I couldn't stop. I even took them with me when I went to my best friend's house for dinner and worked while she cooked. There may have been some wine involved!

more fiber arts collage on recycled glass vials

I used so many bits and pieces to decorate them:

  • sari silk scraps
  • pages from a vintage atlas
  • vintage lace
  • pieces of a 100 year old tape measure
  • recycled ribbons
  • wool and silk yarns
  • remnants from a gorgeous dress my mother had in the 60's or 70's 
  • wire
  • even some vintage child's rings
closeup of fiber arts collage on recycled glass vials

closeup of more fiber arts collage on recycled glass vials

look at all the decorated glass vials

Thanks for looking!

Friday, February 1, 2013

Saving my Moth Eaten Cardigan

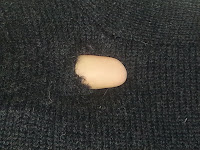
I was very disappointed when I pulled out one of my favorite cardigans - I like it because it's sooo long - and found that moths had wreaked havoc. It was covered in holes. Some of them were large enough to poke a finger through. So sad! I was ready to throw it onto the thrift shop pile (or the to-be-felted pile) when I decided to try to save it. 

huge moth eaten hole in my cardigan
I had seen pictures of people using wool felt to make elbow patches. I thought it was worth a shot. Of course I had holes all over. So I thought I'd try a branch with leaves pattern, thinking that would let me meander all over the sweater to cover all the holes.


First I cut out leaf shapes from some wool sweaters that I had felted for earlier projects. I didn't use a pattern; I just free-handed it. But I like how that made each leaf a little different. Then I needle felted the leaves to the sweater.
first leaves felted onto holes in my sweater


Next I added some wisps of dyed wool roving to add some texture and variation in color to the leaves.

first leaves with needle felted details


Then I used wool yarn to make the branches. I twisted the yarn unevenly as I went to give it texture.

detail of the needle felted branches

I continued to trail the branches all over the back adding leaves where there were holes or where they were needed for the design. But it was all very freehand and unplanned.

back of the sweater decorated with felted leaves

 Here's a picture showing the entire back. The design also wraps around one side so I could cover more holes. 

closeup of some decorated felted leaves on the sweater

I had to add one more leaf on the front to cover a small group of holes. Instead of trailing a branch there, I just made it a falling leaf.

closeup of adecorated felted leaf on the sweater

For the final touch I used a fabric marker and very lightly drew an almost imperceptible curving line down the center of the leaves with a few veins added in. It's almost invisible, but it improved the look overall. 

Now I'm going to try to talk my husband into going to the First Friday gallery walk so I can take it for a test drive. Wish me luck!